Saturday, December 26, 2015

Resolutions for 2016

In January, many people make resolutions of various kinds. Here are a few challenges that I throw out to you for 2016.  See if any of these will be of interest as their purpose is to increase the amount of time you spend thinking, planning, learning or creating art.

I challenge you to learn something new about art, for example:

  • read a new book or two about a style of painting you may not be familiar with, e.g. like abstract for me;
  • subscribe to a new blog or magazine;
  • order new DVDs;
  • sign up for a new workshop or class;
  • study the works of a new artist;
  • etc...
I challenge you to spend more time creating, for example: 
  • watch less watching TV and spend an hour more a week painting;
  • arrange your schedule to have blocks of quality paint time;
  • practice more time management practices;
  • etc.... 
I challenge you to become more involved in your art community, for example:
  • join a new art association;
  • volunteer at one of the many events;
  • attend more vernissages;
  • contribute to more art discussions;
  • encourage and support those that are starting out;
  • etc....
I challenge you to spend more time with artist colleagues, for example:
  • go to art shows or galleries;
  • visit new exhibits at museums;
  • attend their shows;
  • learn from their experience;
  • etc...
I challenge you to share your art, for example:
  • exhibit at any number of art fairs;
  • join online groups that share art;
  • start a blog or send me some articles;
  • etc...
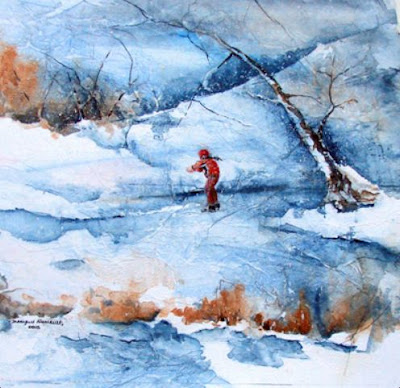
This week's artist find is Robert Goldsmith:. I really enjoy looking at his winter scenes.
Next week, I'll be sharing some lessons I've learned about taking photos for paintings.

Happy New Year / Bonne année à tous,
Danielle

Saturday, December 19, 2015

Merry Christmas Wishes

May you experience lots of love, laughter and joy this Christmas season and a very Happy New Year too.
May you: 
  • never run out of ideas to paint
  • have the courage to explore beyond your comfort zone
  • have an abundance of art supplies
  • remember and apply all the learnings from the various lessons and workshops
  • have loved ones who support you
  • produce art that you are proud of
  • paint in a way that is attractive and interpretive
  • never lose the passion for painting.
Here are a few holiday themed watercolours found on Pinterest.

Joyeux Noël et bonne année!
Danielle

Saturday, December 12, 2015

Watercolour on tissue paper

Last weekend I saw some beautiful watercolours on tissue paper. Here is the technique that was explained to me.

Do you have some old tissue paper lying around?

First wet the tissue paper and scrunch it.  Gently press down the crumpled up tissue paper on a piece of plastic wrap or plexiglass.  Be careful as it tears easily.  While paper is still damp, drop various colours onto the paper.  The paper will dry with some various lines creating texture.

Now the interesting part begins.  The objective is to look at the colours and shapes and visualize an image that could be painted. Once an image is perceived, the painting on paper begins again with a thicker mix of paint.  To bring out the shapes, it's necessary or useful to use a lot of negative shapes.

Note that this surface is not forgiving and you cannot lift any paint.

Once the painting is dry, the tissue paper needs to be glued to a rigid surface and then it can be framed like a regular watercolour

Here are a few paintings by Monique Huneault using this approach:
Monique Huneault watercolour on tissue paper

Monique Huneault watercolour on tissue paper
Have a great week
Danielle

Saturday, December 05, 2015

Artist Trading Cards

One of the art supply store I go to always has packages of artist trading cards on the counter. I have to admit that I had no idea what these are for, so I looked it up.

What do they look like? They are made out of card stock and measure 2 ½" X 3 ½" or 64 X 89 mm card stock.  I don't know if there are some for watercolours.

Artists use this material to produce small paintings that can be traded with other artists who produce cards. So now what you ask? Some regions have face-to-face trading sessions while other exchanges are carried out by mail with other members or though internet swap groups.

One local art association has Artist Trading Cards challenges at some of their regular meetings. Sounds like a fun idea. Aside from that, I'm not sure what other venues exist in my region to use artist cards. What's your experience with these? What do you know that would be beneficial to other readers?


Here is this week's artist find is Craig Andrews.  I can only imagine the time he spent on this detailed painting.
Craig Andrews Watercolour
Have a great weekend
Danielle

Saturday, November 28, 2015

Book Review: The Painterly Approach: An Artist's Guide to Seeing, Painting and Expressing

I'm not sure who recommended that I buy the book entitled "The Painterly Approach: An Artist's Guide to Seeing, Painting and Expressing" by Bob Rohm, but whoever it was knew what I enjoyed. 

Rohm describes "painterly" as how one uses line, edges and masses to suggest and express oneself as an artist. "The painterly approach suggests form, detail and mood from start as each part relates to the poetry of the whole"

Throughout the book, he uses beautiful illustrative examples of his landscapes.

Many art books cover similar topics such as color, value, composition, texture, but Rohm has a poetic way of communicating and illustrating his messages.  I particularly like his explanations of how values and edges work together describe form. 

Although he is an oil and pastel painter there is much information that can be applied to watercolours. I have no hesitation in recommending this inspiring book to other visual artists. This is likely a book that I will reference on a regular basis.

Here are some of his paintings:
Bob Rohm

Bob Rohm
Have a great week
Danielle

Saturday, November 21, 2015

Breaking the rules

We spend a lot of time (at least I do) increasing our understanding and application of the rules of art. There are rules for values, colours, compositions, etc. We try to apply these rules to create "better" art or art the will be more pleasing.

Having said that, how many times have you looked at a painting and thought how wonderful it was but yet, it didn't respect conventional rules.

To successfully break the rules, it's important that you first know the rules. You need to know exactly what you’re doing. Millions of people break the rules of art every day but just don’t know it.

A good number of them do it and have very successful art careers.
Adisorn Pornsirikarn is certainly one artist that doesn't follow traditional composition rules. One evening at an art association event, someone showed one his paintings on the cover of a French Watercolour magazine. I was shocked to hear people seriously criticize it. They had numerous reason, such as he doesn't have a centre of focus. What do you think of this painting? Personally, I'm a fan of his work and look forward to his new paintings that he shares on Facebook on a regular basis.
Adisorn Pornsirikarn watercolour
Of this painting, some might say the light spot at the top left draws the eyes out of the painting. Where's the centre of focus? The bottom left flower should face to the inside of the painting, etc. When I look at this, all I see is an amazing talent and an amazing ability to do some negative painting. I would be pleased if I could paint half as well as he does.

Breaking traditional rules have created some breakthrough works of art and opened new possibilities. Think of the Impressionists, Picasso - they certainly broke the art rules of their times. Initially, their art was not well received by the public who wasn’t yet used to such different ways, but eventually the public taste got accustomed to new ideas. What seemed chocking 150 years ago is consider as classic nowadays.

There’s no rule that can’t be broken, so long as it’s broken with purpose. Rules exist to guide us — a reasonable default when we don’t have a better idea — but they should not stop us from experimenting. In fact, the truly innovative, inspired ideas are frequently the result of breaking a rule that others many not dare to break or are too focused on trying to adopt.


Have a great week
Danielle

Saturday, November 14, 2015

When is mud .. mud?

Recently on AT discussion group one member asked "When is mud .. mud?"

Making ‘mud’ is often one of the first problems that beginners
mention especially when mixing browns, greys and greens.
 

I particularly thought NSerie's response to this posting was interesting. Here is an extract from his response. Following this, I'll provide some tips to avoid making mud.

 
What is "mud" - dead, lifeless sullied color.
 
How is it made? - in the palette or overworking on the paper. The formula is simply a combination of the three primaries. Mud is, get this, a neutralization of color temperature. How do we remedy? Re-establish a color temperature dominance, either cool or warm.
 
Sounds complicated? Sorta.
 
Bored? Try this - Get a scrap piece of paper. Draw a 2" x 3" rectangle on it. Paint a blue of your choice in it. Now while still wet with your scrap at an angle, drop in another blue of your choice into the top of the rectangle and watch the two blues blend (granulation) as the new blue drips slowly into the old blue. No problems. Cool color dominance! You can do this all day long with 100's of blues - no mud.
 
Now with the paper still at an angle AND STILL wet, mix up a nice juicy warm red in your palette and now drop that into the rectangle. Uh-oh - mud! The color dominance has gone from cool to NEUTRAL as now we have red yellow and blue now mixed!
 
How to fix? Well keeping that rectangle wet drop more warn red or another red into the rectangle. Slowly you are re-establishing a new color dominance of warm! Blue will "disappear" so to speak. Color dominance has now been re-established.
 
More mud wanted? Well now in your STILL WET (THE RECTANGLE STAYS WET THE ENTIRE TIME) rectangle, drop in some blue and watch it drip into the red an become mud. You get the idea.
 
And if its something you desire - its easy to make! Have fun!
 
Thanks NSerie for allowing me to use the above. He credits Don Andrews for the principles stated above.
 
Here a few guidelines for avoiding mud.
  • apply thin layers of glazing on bone dry paper
  • use transparent colours for your mixes
  • limit use of opaque colours when mixing
  • try to avoid mixing two warm. Rarely will you create mud with two cool colours or one warm and one cool
  • limit number of colours in your mix
  • when mixing 3 primary colors do not use similar quantities
  • avoid mixing secondary color with its complementary primary in similar proportions
If you have created mud and decide to lift it” the Mud off, I suggest using a big wide brush to put clean water over the area. Do not stir the mud up with heavy handed strokes.

This week's artist find is Judith Haynes Levins. There is certainly no mud in this painting. I love the fact that she only used a few blues (UMB and Indigo)
Judith Haynes Levins:
Have a great week
Danielle


Saturday, November 07, 2015

Cleaning brushes and keeping the point

So how do you maintain your kolinsky or other natural fibre watercolour brushes?
 
Due to the price of these brushes, we often treat them as our "most prized possession". I don't recall getting any instructions when I bought them.
 
When we paint, particles of the paint accumulates at the base of the brush. This pushes the hair brushes apart and affects the quality of the point we so enjoy.  That's why it's important to keep the brush clean.
 
To clean these delicate brushes, avoid strong soap which may damage the hairs and remove the natural oils.  It is suggested that you, using mild soap and cool or warm water, swirl the soapy brush in the palm of your hand and rinse. Don't forget to rinse until the soap and water runs clear. 
 
Here is the soap I use:
One other caution is to monitor the water temperature. Some believe that hot water may cause any remaining paint to clot in the hairs of the brush.
 
Once rinsed, it's time to consider reshaping the brush heads to have the point.  Now there are a lot of varying advice on this, here are some of them:
  • rest brush with the bristles facing upwards to dry off.
  • use your saliva to shape the bristle - careful with cadmium paints which are toxic
  • tap or flick the brush on one finger recreate to force the point. This is my favourite option.
Here are a few things to avoid
  • leaving them in the water with the hair end;
  • using your brush with acrylic paints or inks;
  • using them from scrubbing;
  • dipping the ferrule of your brush into water;
  • allowing your brush to dry out with paint in the tuft. 

This week's artist find is Spencer Meagher.  This is an acrylic painting abd I love the subtle changes in values and the limited palette.
Spencer Meagher 
Have a great week
Danielle

Saturday, October 31, 2015

Dry brush

Many watercolorists enjoy exploring different and creative ways to bring various forms of texture to their paintings. This includes the use of the dry brush technique.

Dry brush is a versatile and creative technique that places more pigment and less water onto the surface of your paper. This technique works best on watercolor paper that has a nice texture to it, such as rough or even cold press.

Dry brushing is a fairly easy technique. To use it,  the brush must be loaded with color, then blot it several times onto a paper towel. Using only the side of your brush hairs, lightly skim over the surface of the paper. To deepen the value, repeat the skimming strokes again, after the surface has been allowed to dry.  This last part is very important.

When you vary the speed the brush movement you have slightly different  effects. Experiment to see the differences. Varying the pressure will also create fun effects. Painting with less water will have greater variety of edges.

Dry bush marks add a great deal of energy and interest to a painting.  This type of  brush stroke creates a range of broken edges implying neither hard nor soft edges. It can be used to create sparkle on water in seascapes and river paintings or creating impressions of foliage on trees or creating rough bark on tree trunks.  There are so many different uses for this technique.

Another variation on the application of his technique that I like to use, is to dry brush an area and then apply a spray and letting some of the edges soften and merge.

This weeks artist find is Cathy Hillegas
Cathy Hillegas
Have a great week
Danielle

Saturday, October 24, 2015

Painting flat or on an angle

What's your preference? painting on a flat surface or on an angled surface?

Many beginner watercolourists ask what is the ideal angle of a painting surface.  This question requires a more complex answer than just to say about 20 degrees. Like many things in life, the real answer is: “It depends on .....”

Obviously, water flows faster or slower depending on the angle of the slope it is on.  The speed of the flow depends on how much water is on your watercolour paper, and the smoothness of your paper. It will flow faster on hot press paper and not so fast on rough paper. If only a thin layer of water is on your paper then it will not flow very fast no matter what angle your board is set to. On the other hand, if you have a lot of water on your paper, then the steeper the angle of the surface the more your watercolours will flow.  In answering the question of how much angle, you have to ask yourself if you want the paint to flow and how much control you want.

Here are some reasons for painting on a flat surface:
  • you plan on using lots of water and don't want that streaky effect;
  • when painting in hot weather, a flatter angle will slow down the drying time;
  • may feel more natural since we are used to leaning over to read and write.

Here are some for angled surfaces:
  • easier to step back to get a better perspective of your painting;
  • easier to maintain a better posture (avoid leaning over with rounded shoulders) to reduced back pains;
  • reduces tendency to get too close and add too many details. I think painting using an easel forces you to loosen up;
  • you like the streaky effects (dribbles).

When I watch artists paint on very angled surfaces, I certainly get the impression that the artist is more proficient. Although I paint on almost flat surfaces, I have painted using my two easels. These tools requires much more practice before I become comfortable using them.  If you are getting a travel easel, the ability to angle the surface is a key feature.

There is no right or wrong angle for everyone or every painting situation, it's all part of developing our style and that will change with time.

Today's artist find is Jan Comstock
Jan Comstock "the dreamer"

Have a great week
Danielle

Saturday, October 17, 2015

Free watercolour e-books

The web has so much to offer us and probably equally to many other hobbies.  Have you come across a number of free e-books? here are some that I have found:

http://www.watercoloursecrets.com/ebook.html  (from our own Bob on Art Tutor)
http://www.artistdaily.com/watercolor-painting-techniques
http://art.webflexing.com/EbookTreePaintingInWatercolor/ (35 pages of trees)
http://issuu.com/ (links to many magazines)
http://www.craftsy.com/guide/beginners-guide-to-watercolor/16391?ext=SAS_Painting_eGuide_BeginnersGuidetotheWorldofWatercolor&utm_source=ShareASale&utm_medium=Affiliates&utm_campaign=General-Registrations&initialPage=true&SSAID=352267


I'd be happy to add to this list if you send me your links

Although it's great that these ebooks exist, I prefer videos or books by seasoned artists. However I do like to look at the one with 35 pages of trees since I enjoy painting landscapes.

I'll be back from vacation next week and will have more time to do more research for this blog.

This week's artist find is Anna Mason
Have a great week,
Danielle

Saturday, October 10, 2015

Van Gogh in Arles France

A few days ago, I was in Arles, in the south for France. I found out that Vincent Van Gogh arrived there in February 1888 and left in April 1889.

He was quite prolific during this period and produced more than 200 paintings. Many consider his time in Arles to be his most creative of his career since it came after some valuable learnings. Some or his best known paintings were produced in this area of Provence. These included the still life of "Vase with Fifteen Sunflowers" and his famous Sunflowers series. 

Would you believe that Arles does not possess a single Van Gogh painting.  Recently, the  "
Fondation Vincent Van Gogh Arles" was created to honour his legacy, and to celebrate his influence on artists in the 20th and 21st centuries. The foundation exhibits a dynamic collection of artworks - a collection which begun life in the 1980s - made in tribute to Van Gogh by some of the most exciting modern and contemporary artists.

In addition, many of the places that Van Gogh had visited and painted in Arles were destroyed during World War II bombing raids.   Therefore, I was not able to visit any café or place where he stayed.

The south of France has a rich artistic heritage and I am enjoying visiting a number of galleries - in addition to a number of other sites of course.

Today's artist find is Michel Douillard:

Michel Douillard aquarelle
Have a great week
Danielle
 

Saturday, October 03, 2015

Synthetic or natural - brushes that is

What's you preference for selecting paintbrushes for watercolours? It all comes down to personal preference. 

Your choices are based on performance, your techniques, how much you are willing to spend and the feel of the brushes.

Many people make choices based on hair - synthetic or natural - which impact performance of the brush. A watercolour brush should be able to hold a good amount of water in its belly, be able to maintain a fine point, and distribute the water and paint smoothly and evenly on the paper surface. In addition, the brush should spring back to it's proper shape after each use and be able to maintain that shape for as long as possible. So what are the choices?

Sable
Most people agree that the best paintbrushes for watercolors are made from sable hair. The very best sable hair is called Kolinsky sable because it's sourced from a weasel (not actually a sable) living in the Siberian region of Kolinsky. Brushes made from sable should last for years Sable brushes, when properly cared for, will maintain their shape and texture for years. These are often the most expensive brushes. Some countries consider these animals as protected and therefore are now banning the import of sable brushes. Consequently, they will be more difficult to acquire.

Hog BristleHog bristles are best used in brushes for large washes. Additionally they last a long time and are very affordable. I've heard that those from China might be better. 


Squirrel, Ox or Goat
Some brushes are made from a variety of these hair. When used for round brushes, they don't tend to hold their point. However, they tend to make great mop brushes. Ox hair also makes great flat brushes

Synthetic hairs (fibres)
Synthetic brushes are usually made from nylon or polyester. Often the are designed to behave like the natural hairs at much lower the cost. There is a great range in quality and performance, but in general they tend to hold a good point. Due to the nature of the fibres, they cannot hold as much water. However, some manufacturers are producing fibres that are not smooth and can hold a bit more water.

Combination Hairs
Some brushes are made with a combination of sable and synthetic fiber or sable and some other less expensive natural hair. While some of these brushes are cheap alternatives, some also have decent performance


Successful artists use all different types of brushes. Before buying one of these brushes why not try them out in the store or see how it's reviewed by other artists.


Today's art find is Sen Lacson
Sen Lacson watercolour

Have a great week
Danielle

Saturday, September 26, 2015

Book review: Art & Fear: Observations on the Perils

Have you read any interesting books lately?
 
May I recommend you read "Art & Fear: Observations on the Perils" by David Bayles and Ted Orland.
 
This book is about the challenges in making, or not making, art. It is a quick, no-nonsense, part-philosophical-part-practical examination of what it means to make art, no matter the medium or the form, and to continue to do so in spite of its inherent challenges. The authors' basic premise is that you can and will only ever be you, and all the other people in the world will also only ever be themselves. It might seem obvious, but the logical conclusion here is that it is a pity to not make art because you are the only person who could ever make the art that you make.

Another message from the book that resonated with me is that it is useless to compare your art to that of other artists. With that notion in mind, the authors explore different forms of fear that lead people to stop making art, and explain concisely why each one is silly, surmountable, and ultimately up to you to overcome. It's a beautiful piece of quasi-self-help that offers only blunt and useful considerations without any of the fluff and hand-holding with which self-help, as a genre, is infested.
At the end of the day, the individual recipe any artist finds for proceeding belongs to that artist alone and is non-transferable and no of little use to others.

Overall, the authors address the question of not "why do we make art?" but "why do we stop making art, why do we quit, how do we keep going?".

Here is a quote from the book:  “To require perfection is to invite paralysis. The pattern is predictable: as you see error in what you have done, you steer your work toward what you imagine you can do perfectly. You cling ever more tightly to what you already know you can do – away from risk and exploration, and possibly further from the work of your heart. You find reasons to procrastinate, since to not work is to not make mistakes.”

Today's artist find is Angus McEwan:
Angus McEwan, coming apart at the seams

Have a great week
Danielle

Saturday, September 19, 2015

Sizing on watercolour paper

Have you ever wondered what sizing was all about? I attended a session at a local art association meeting recently where the topic was paper and included watercolour paper and sizing. So I’ll try to transmit what I’ve learned in a simplified fashion. 
 
Why should we learn about sizing and how it can affect your preference for wetting your paper for stretching?
 
First, what is sizing? Sizing is a gelatin added to your watercolor paper during the manufacturing process.  Manufacturers of good papers include it in the pulp before pressing, while others also add it to the outside layers of the paper.
 
So what does sizing do for us? It controls the absorbency of the paper. Since most papers are made out of cotton and many are 100% cotton, without sizing the paper would be very absorbent - maybe too absorbent. That would translate into the paint/colours being "swallowed" by the paper. If the paint would be absorbed immediately, without sizing, you not be able to push the paint around. Sizing allows you to control your paint. Bottom line - gelatin makes the paper less absorbent and helps you control the paint on the paper and make even washes. 
 
Absorbency affects how vibrant the colours looks. More sizing keeps the paint on top of the paper which make your paintings more brilliant. Some people reduce the sizing and this practice results in the paint seeming to disappear. Actually, the paint just goes deeper into the paper fibers hence the increased lightening of colours as the paint dries
 
I remember a discussion at a recent workshop where some participants were talking about the unevenness of sizing with some papers. Uneven sizing can cause dark spots when the paint soaks into the paper. Imagine working on a sky and having unexplained blotches in your sky – regardless of your most skilled paint strokes. Luckily, my favorite brand of paper, Fabriano, had no reported incident of uneven sizing.
 
One needs to make some choices before applying paint to paper. Should you want more absorbency, you lessen the sizing. On the other hand, if you want less absorbency, you keep the sizing.
 
In addition to soaking the paper to stretch it, some do it to lessen the sizing of the paper. To get the desired amount of sizing, the correct timing for the soaking takes practice. One of the dangers of soaking the paper too long is that too much soaking can move the sizing to make an uneven absorbent surface. Spots where there are increased sizing will resist the paint placed on it. Someone once reported that spots are less likely to happen when the paper is wet by running water than by soaking.  with this method, there is no chance for the displaced sizing to stay in one place and make spots. 
 
Remember, there is still sizing mixed in with the paper pulp itself so the sizing is not gone completely.  
 
Other practices that remove sizing include using the Magic Sponge. If you've ever used it, you know you can get to the white of the paper but then the paper behaves differently - that's the lack of sizing on the surface.  There is also scrubbing your paper with a stiff brush to lift paint.
 
Other things I've heard but have not been able to nail down is how sizing on older paper behaves. I've read anecdotes of the sizing not behaving well.
 
Should you wish for a more comprehensive explanation, you'll find a lot of more technical information available online.   Here are a few:
 This week's art find is Hannie Rieuwerts:
Hannie Rieuwerts' watercolour entitled "against the light"
Have a great week,
Danielle

Saturday, September 12, 2015

Do your find some topics more difficult to paint?

This is a very simplistic question, and I'm sure everyone would answer with a different topic. What's easier varies from person to person.

Are there generally recognized "easier" and "harder" subjects to paint? Or alternatively, are subjects different enough that some people are "naturally" just better at painting certain types of things, and always will be, regardless of how much work or practice they do?

I've always been attracted to nature and the outdoors.  This includes landscapes and florals.


Some people find landscapes difficult for two major reasons: composition and perspective. Landscapes generally have more elements and require more to think about compositionally. Then there's the issue of perspective: atmospheric perspective, point perspective (one, two, or three?). Both of those are complex subjects. 

For some reason I feel comfortable painting landscapes, what intimidates me are portraits and figures.  Any thing that is "off" with a portrait throws off the entire painting and the person looks like he or she is disfigured. Accuracy in portraiture is critical and  every paint stroke must be full of purpose and intention. Hence, I admire those who paint portraits well.

In the end, there might not be topics that are easier or more difficult to paint, but subjects that we have a close connection to.  If we like something, we find ways to paint it even if we have technical problems. If we don't like it.. there's no salvation and of course...no painting. 

This week artist find is Silvia Pelissero (aka Agnes-Cecile)
WAtercolor by Silvia Pelissero

Have a great week
Danielle

Saturday, September 05, 2015

Use of a granulating medium

A few weeks ago I was painting a scene with a lot of large rocks and decided to use a granulating medium to see if I could create more of a mottled appearance to enhance the granulation of pigments and give the rocks more texture.

I was using the Winsor & Newton product instead of water to mix my colours. The granulation medium will cause colours which usually give smooth washes to granulate to a greater or lesser degree depending on the pigment. Generally the modern pigments, prefixed by ‘Permanent' or ‘Winsor' will be most affected by the medium.  I've since learned that for maximum effect, it is best to wet the desired area of paper with the medium and then make a washes using the medium instead of water. Apply it and leave to dry. All granulated washes dry flatter, if this occurs, as the wash dries keep disturbing it with a brush. This will prevent the wash just flowing into itself and levelling out. Granulation is also increased by the roughness of the paper and by the absorbency.

As with all techniques any new method needs practice and as with all water colour washes it can never be guaranteed to get exactly the same results every time.


To the casual observer of the painting that I did using this medium, I'm not sure the granulating medium will make much of  a difference.  I'll have to try it again to make to get more information.

What has your experience been with a granulating medium?

For this week's artist find, here is  Jacqueline Gnott:
Jacqueline Gnott watercolours
 Have a great week
Danielle

Saturday, August 29, 2015

How do you know when it's finished?

Have you every asked yourself when a painting is finished. For some artists, this may seem like an easy question to ask. However, for others—regardless of the medium—identifying when a painting is completed is more complicated. Choosing when to stop altering a painting can be a highly individual decision and there are instances in which a painting is never fully done, at least in its artist’s mind.

Often the sense of completion is a purely intuitive one. I admire those who are able to look at a painting and say, ‘It’s done now.’ However, when I see the painting the next day with a fresh pair of eyes, after I think it may be done, I always add more to it. There are some paintings that go through many false finales before they are deemed complete.

Other times, you get to a stage where you begin to wonder whether you've overworked that painting.

Here are three tips when you think a painting is just about done, but not quite:
  • Hang it up somewhere for a couple of days and look at it from different angles and distances
  • Look at the reflection of the painting in a mirror
  • Take a photo and look at it on your monitor
These options help you see it anew.
 
With watercolours, it's probably better to stop sooner rather than later. It's far easier to add to a painting if you decide it's not yet finished than to undo something if you decide the painting didn't need it after all. You're more likely to ruin a painting by overworking it than by not finishing it.
 
Because we are constantly improving, a painting that was once considered done may no longer feel like it. I can't tell you how many older paintings I've gone back and made valuable improvements. Do you also do that? There's a level of satisfaction in improving older paintings.
 
When I saw this painting earlier this week, I knew I had to share it. What an original subject. It is from Fran McGarry.
Watercolour from Fran McGarry
 
Have a great week,
Danielle


Saturday, August 22, 2015

Fear of posting on social media

How many times have you heard that you should get on Facebook, get on Twitter, and create a presence to promote your art. Do hearing things like this cause you to be anxious? What if you say the wrong thing? What if you get negative feedback? What if nobody follows you? Despite these fears, what might seem like a major risk — or a time-waster, at best — is actually an invaluable tool for developing a following for your art.
 
Here are a few tips if you want to explore social media:
  • Focus on socializing instead of selling;
  • Think quality over quantity and focus on your goals;
  • Be authentic and do not go into automation. Staying authentic is key;
  • Respond and listen to your audience.
Some artists are concerned that their art, during the process of seeking greater exposure on social media, will be copied (theft of intellectual property). Consequently, many artists consider watermarking their artwork before sharing it online. However, inserting a watermark is a pretty poor way to deal with the problem.
 
The watermark might actually decrease the appeal of sharing. An important benefit of posting your art online is the increased exposure your work gets when it is shared. Viewers are less likely to share artwork that is watermarked because it loses much of its appeal.
 
Let's get real, the likelihood of theft is pretty low - but it does happen. There is an overwhelming amount of art online. And many of it is extremely good. Is your art likely to be copy?  In addition, the images you share online are pretty low resolution. These images would result in poor reproductions.
 
In today’s world, a watermark will not prevent someone from stealing your image if they wish to. Sad but true….

If you are considering posting your art on social media, what concerns do you have?
 
Linda 3 from ArtTutor, recommended that I present Michael (the Gorilla) as a featured artist this week.
http://www.koko.org/gorilla-art-0
https://www.youtube.com/watch?v=vBNwLf3CyiU

Gorilla art
Have a great week,
Danielle


Saturday, August 15, 2015

Gatorboard and Foamcore

Do you use gatorboard or foamcore as a support for your watercolours? These boards provide a hard surface on which to mount watercolor paper before beginning a painting.  The watercolorist can use artist's tape, clips or staples to secure the watercolor paper to the surface of the board.

So what's the difference between gatorboard and foamcore? Gatorboard has an exceptionally rigid surface and is very durable and lightweight. These can be large enough to hold a full sheet of paper. Foamcore isn't as sturdy and doesn’t stand up to the moisture or wet in wet watercolor technique, especially if you wet your paper on both sides thoroughly.

Foamcore and gatorboard look a lot alike. The difference is that while foamcore is paper on either side of a slice of styrofoam, gatorboard is a heavy (think oak tag) moisture impregnated paper on either side of the same styrofoam. Since the paper doesn't accept moisture, it is much more stable dimensionally. It's also just plain tougher. Gatorboard comes in black and white, foamcore only in white

Gaterboard is definitely more durable but it is the more expensive of the two. In addition, foamcoare is more easily damaged. So which do you use?


Today's artist find is Virgil Carter
Virgil Carter Watercolour
Have a great day
Danielle

Saturday, August 08, 2015

Do you listen to music while you paint?

Certain types of music may inspire you while you paint or while you are being creative.

I enjoy having music playing in the background while I paint. Upbeat music sometimes inspires me to be very expressive with my brush. This is particularly useful when I do the first washes on the paper. Other times, more mellow music helps me to create moody paintings. This type of music helps me to be more precise in my brush strokes.

How much of the music do you actually listen to? Although I like to have something when I start, it quickly turns into background noise that I don’t pay much attention to.

Two Americans, Morgan Russell and Stanton Macdonald-Wright, were influential forces in furthering the connection between music and art. They were interested in the psychological effects of color and sound and they developed a method of color composition based on what they termed color chords derived from the color wheel. Russell has been credited for inventing synchromism, meaning “with color”. It was chosen as an analogy to the musical term symphony to denote his emphasis on color rhythms. In her book “Synchromism and American Color Abstraction, 1910-1925”, Gail Levin explains the American avant-garde art movement known today as Synchromism.

What type of music do you like to listen to to get you into the zone? Are you more the Michael Buble type, celtic folk type or the classic rock like Journey, Aerosmith, Van Halen.


Today's art find is Steve Rogers:
Steve Rogers watercolour

Have a great week
Danielle


Saturday, August 01, 2015

Practice Paper

I read an interesting online discussion this week.  The topic was the brand of paper to use for watercolour practice.

For those who like to practice watercolour painting regularly and are reluctant to pay a lot for watercolour paper, the cost of paper can add up?  Do you consider buying cheaper paper? Many from the online discussion recommended buying cheaper paper.
 
What are some of the better options?
  • use the other side of any painting you don't like
  • find an economical practice paper such as Fabriano Watercolour 280gm 130 lb paper which is cheaper that Fabriano Artistico 140lb.
  • use paper from a good manufacturer and cut down the full sheet  to 1/4's and 1/8's and that you can paint on both sides makes it affordable. 
  • Search for sales on paper.
Some people believe that practicing on cheaper paper, like Strathmore. In my opinion, paper is most important watercolour tool. When starting out you may use a good brand of student paints like Cotman, but don't skimp on the paper.

In the end you don't want to develop techniques based on cheap paper. You just end up having to un-learn them when you decide to paint on good paper.
 
You would only be setting yourself up for a lot of frustration by practicing on anything other than quality watercolour paper. For one thing, when you try to apply what you learned on a different surface in the future, the result will be different and you'll have to re-learn the skill or technique all over again.

This weeks artistic find is Tim Saternow.
Tim Saternow watercolour
Have a great
Danielle

Saturday, July 25, 2015

Do you worry about the Lightfastness and Permanency of Watercolours?

Creating a watercolour painting takes some time and energy. Surely you don’t want your creations to fade, discolor, or otherwise deteriorate. While there are some things you can do such as not displaying your watercolours in the full sun and choice of products (ex. paper and framing), there are some choices you can make that relate to the use of pigments.

Some pigments fade for a variety of reasons - exposure to light is the main one, but acids and alkalis will damage many pigments. However, the prime consideration is the light-fastness of the pigments used in producing the paint. 

Ideally we should try to used those paints whose pigments are rated good or excellent in light-fastness. The information is normally found on the label of paint tubes. However, it’s not always easy to read because the print is too small and its often displayed in “code”.

Winsor & Newton has an easy reference chart online to indicate the lightfastness and permanency and the colour pigment(s) used.


Although paint manufacturers provide this information on their website, it is normally found when looking at individual colours. Let me know if you find a table similar to the W&N one, that is easy to use as a reference tool.

I was disheartened when I found out that one of my favourite colour is one of the few colours that is only “moderately durable”. That colour is Rose Madder Genuine from W&N.  What colour do you use instead for pink flowers? 

Here is a link to some additional information on lightfastness. It may be a bit dated, but remains interesting to read.  If you like the technical aspects of paint, focuss on the pigment ingredient number (e.x. cobalt blue -
PB28) section.http://www.handprint.com/HP/WCL/pigmt6.html#lightfast

Today's art find is suggested by DragonGirl (from Art Tutor) and is Allan Kirk.
Allan Kirk watercolour

Have a great week,
Danielle

Saturday, July 18, 2015

Does planning curb creativity in art?

 
An Art Tutor members asked if art can succeed without planning when relying only on creativity. Can one produce great art without organization, taking conscious action steps, big and small, with consistency?    

Many agree that great compositions, which are at the source of most great paintings, don’t just happen by accident. They take planning, patience, and a knowledge of all the visual elements at your disposal. The great thing is, no matter how much or how little talent you have, you’ll always be able to improve your art by sketching out a good composition before you begin.  

Creating means generating new ideas, visualizing, looking ahead, considering the possibilities. Planning and evaluating means analyzing and judging, picking apart ideas and sorting them into piles of good and bad, useful and useless.

Most people evaluate too soon and too often, and therefore create less. In order to create more and better ideas, you must separate creation from planning, coming up with lots of ideas first, then judging their worth later.

This a big problem in any field where there are lots of gurus who tell you their secrets of success. It’s wise to listen, but unwise to follow without question.

Some of the most successful people in the world did what others told them would never work. They knew something about their own idea that even the gurus didn’t know.

Every path to success is different. Therefore, although planning is always encouraged, I suspect that some artists have great instincts for composition, so they spend very little time planning and use their creativity to provide the other half of the equation in order to produce beautiful art.

However, I have seen many painting where is was apparent that no planning occurred and the painting did not keep the eye or focus within the painting or lacked a centre of interest to attract the viewer.

Since planning is always recommended it is also important to recognize that there are different levels of planning and that some level of planning increases the changes of an artist’s success

Whatever approach you favor, paintings are about communications. Like all types of communications, some planning is required if the message is to be received as intended.

Creativity and planning are not at odds; they both complement each other well. So to answer the question, I do not believe that planning curbs creativity in art. What do you think? You can leave comments below.

Today's artist find is
Steven Hileman:

I like the colour harmony in this painting.

Have a great weekend.
Danielle


Saturday, July 11, 2015

Don't you love painting rocks

It’s common to see rocks in landscapes. Rocks are fun to paint because they can be formed using a variety of methods.

But first, you must draw your rocks. When you sketch them, pay attention to the different shapes and angles.  If we don't pay attention, they may end up all looking the same.

One common method to paint rocks is to first lay in a wet in wet layer of watercolor, using the largest brush you comfortably can for the size of your work. Mix the colours that you want use for the rocks and vary the tones for interest. Remember to keep the warmest colours for the rocks in the foreground. After applying colour, you can blot it with a tissue to created blotchy effects. Once dry, add the shadows and any details. One way to finish a rock is to apply a bit of drybrush work using a darker colour.

Other techniques to suggest texture on rocks include:
  • using a sponge to create the blotchy effects. This can be applied early or late in the process. When applied late in the process, I would suggest that the paint not be to dark to create a contrast that doesn't look natural.
  • splattering paint using brush or toothbrush. This technique is normally used last.
  • dropping a few drops of salt in the wet wash. The effect will soften with subsequent layers of paint.
  • scraping with credit card when paint is still wet
  • once the paint is dry, use a utility knife to scrape highlights and texture.
Roland Lee has an interesting step by step demo on how to paint rocks in the southwest United States. When you get to that web page (link above), click on the large image to start the demo. Here is one of Roland's paintings.  He paints mostly scenes with rocks. Here is one of them.
Roland Lee -River of time watercolour - rocks
 
Have a great week
Danielle